Open concept layouts dominate modern home improvement trends, especially in older U.S. houses originally designed with compartmentalized rooms. Merging kitchens, dining areas, and living zones creates airy, multifunctional spaces perfect for today’s connected lifestyles. Real estate data shows these renovations can increase property values by up to 7%, appealing to buyers seeking move-in-ready designs.

Many homeowners remove dividers to transform cramped areas into expansive communal hubs. But before swinging a sledgehammer, there’s a critical question: Is this structure load-bearing? These supports carry weight from roofs or upper floors—removing them without proper reinforcement risks serious damage. A certified contractor or engineer can provide clarity.
This guide covers planning essentials, safety protocols, and common pitfalls. You’ll learn how to assess feasibility, navigate permits, and execute projects smoothly. While the idea seems simple, every home has unique challenges—electrical wiring, plumbing, or HVAC systems might hide behind surfaces. Let’s start your journey toward a brighter, more functional living area!
Key Takeaways
- Open layouts boost natural light and resale potential.
- Always confirm load-bearing walls with a professional inspection.
- Permits and structural assessments prevent costly errors.
- Hidden utilities may complicate DIY projects.
- Proper planning ensures safety and design success.
Understanding Wall Types: Load-Bearing vs Non-Load Bearing
Not all dividers are created equal—some hold up your home, while others just divide space. Knowing which is which could save you from structural disasters. Let’s break down how to spot the difference.
Spotting Structural Supports
Load-bearing structures typically run perpendicular to floor joists or align with central beams. For example, partitions separating a kitchen from a dining room in older homes often serve this critical role. Check blueprints if available—they’ll show thick lines marking these supports. No blueprints? A builder can inspect joist directions or look for doubled-up studs behind plaster.
When Removal Is Simpler
Non-load-bearing dividers usually parallel joists and don’t support upper floors. These are easier to modify but still require caution. Before cutting studs, verify there’s no plumbing or wiring inside. Thinner plaster layers often hint at less critical roles, but always confirm with a professional. As one contractor notes: “Even ‘simple’ projects need planning—hidden surprises lurk behind every surface.”
Pro tip: If a partition sits either side of a main beam, leave it untouched. Reinforcing the area with temporary supports during work prevents sagging. Whether DIY or hiring help, clarity on your home’s bones ensures safer, smarter renovations.
Assessing Structural Importance and Safety Measures
Safety starts with knowing what’s holding your home together. Before modifying any space, a professional structural assessment is non-negotiable. Licensed inspectors check hidden systems like wiring and plumbing while confirming which elements support upper floors or roofs.

Consulting Professionals for Structural Assessment
Experts use tools like thermal cameras and moisture meters to spot risks homeowners might miss. For example, a cracked beam or worn nails in framing could compromise stability. Building codes often require permits for structural changes—skipping this step risks fines or unsafe conditions.
| DIY Checks | Professional Inspection |
|---|---|
| Visual surface review | Infrared utility mapping |
| Basic stud detection | Load capacity calculations |
| Partial power shutoff | Full system diagnostics |
Always turn off power at the breaker before work begins. This prevents accidental contact with live wires. Secure the bottom plate temporarily to keep the work area stable during adjustments.
Even small errors—like misaligned supports—can lead to ceiling cracks or uneven floors. As one contractor warns: “What saves time today might cost thousands tomorrow.” Partnering with pros ensures compliance and long-term safety.
Preparing Your Workspace and Safety Protocols
A safe renovation starts long before the first tool is picked up. Proper preparation reduces risks and keeps your project on track. Let’s explore how to create an efficient work area while prioritizing safety.
Establishing a Safe Work Area
Begin by clearing the zone of furniture and decor. Use heavy-duty plastic sheeting to seal doorways and vents—this contains dust and debris from spreading. Designate a separate path for moving materials to avoid tripping hazards.

Cover nearby surfaces with drop cloths, especially on the side closest to the project. Temporary zip walls or barrier tapes help mark boundaries. Always keep fire extinguishers and first-aid kits accessible.
Personal Protective Equipment Guidelines
Safety goggles shield eyes from flying particles, while N95 masks filter harmful dust. Sturdy gloves protect hands during material handling. Don’t overlook steel-toe boots—they prevent injuries from dropped tools.
Organize tools in labeled bins to maintain order. Store sharp objects separately and unplug equipment when not in use. As one contractor advises: “Chaos breeds accidents. A tidy space lets you focus on the task.”
Following these steps creates a foundation for smooth, injury-free progress. Now you’re ready to tackle the next phase confidently!
Essential Tools and Materials for the Project
The right tools transform challenging projects into manageable tasks. Gathering quality equipment ensures efficient progress and reduces frustration. Let’s explore the must-haves for creating open spaces safely.
Reciprocating Saw Selection and Usage
A reciprocating saw is your best friend for cutting through studs and fasteners. Choose demolition blades for wood and metal-cutting variants for pipes or nails. Milwaukee’s Shockwave blades or DeWalt’s Bi-Metal options handle tough jobs without snapping.
Always secure materials before cutting to prevent kickback. Keep the saw perpendicular to surfaces for clean slices. As one contractor advises: “Let the tool do the work—don’t force it through stubborn spots.”
Other Key Tools: Pry Bar, Hammer, and Utility Knife
A pry bar lifts trim and separates materials after cutting. Pair it with a claw hammer to pull nails from studs. For precision, a utility knife scores drywall edges before removal—critical for clean demolition work.
Store blades in labeled cases to maintain sharpness. Wipe metal tools after use to prevent rust. Remember: Dull equipment slows progress and increases accident risks.
Pro tip: Rent heavy-duty tools if you’ll rarely use them again. This saves money while ensuring professional-grade results. With these essentials, your project stays on track—and your home stays intact.
Managing Utilities: Wiring, Plumbing, and HVAC Considerations
Your dream open space could hide a web of wires and pipes—overlooking them risks shocks or floods. Modern homes often route electrical, plumbing, and HVAC lines through structural partitions. Identifying these systems early prevents costly damage and keeps your project safe.
Safely Disconnecting Electrical Systems
Start by turning off the main breaker. Use a non-contact voltage tester to confirm circuits are dead—green lights don’t always mean safety. Remove outlet covers to inspect wiring paths. If you spot tangled wires, call a licensed electrician. As one pro notes: “Cutting live wires fries tools—and your patience.”
Handling Plumbing and Ventilation Challenges
Shut off water valves feeding the area. Check for hidden pipes by tapping surfaces—hollow spots may signal empty cavities. For HVAC ducts, seal openings temporarily to prevent dust from spreading. Rerouting plumbing or vents often requires permits. Partner with specialists for complex structural modifications.
| DIY Steps | Professional Help Needed |
|---|---|
| Basic circuit shutdown | Rewiring entire rooms |
| Surface pipe checks | Relocating drain lines |
| Dust containment | HVAC system redesign |
Exposed lines after demolition demand immediate attention. Cover them with protective caps or temporary patches. Remember: Even capped wires can pose risks if mishandled. Plan every utility move before swinging tools—your safety depends on it.
Techniques for Efficient Wall Removal
Transforming your space starts with smart demolition—but rushing leads to regrets. A systematic approach keeps your project safe and minimizes damage to surrounding areas. Let’s walk through proven methods to achieve clean results while avoiding common headaches.
Step-by-Step Removal Process
First, use a utility knife to score the drywall along seams. This creates clean edges and reduces debris. Peel away panels carefully to expose studs and hidden utilities. For stubborn sections, a pry bar lifts materials without cracking adjacent surfaces.
Next, identify studs with a detector. Cut through vertical supports using a reciprocating saw—keep blades sharp for smooth slices. If working near a beam, install temporary braces first. Always wear gloves and goggles when handling jagged metal or wood.
| Task | Tool | Safety Tip |
|---|---|---|
| Drywall removal | Utility knife | Cut away from your body |
| Stud cutting | Reciprocating saw | Secure loose wires first |
| Debris cleanup | Heavy-duty bags | Lift with knees, not back |
Clean-Up and Final Touches
Sort debris into separate piles: recyclables, landfill items, and reusable materials. Use a shop vac with a HEPA filter to capture fine dust. Patch floor scratches with matching wood filler or tile grout.
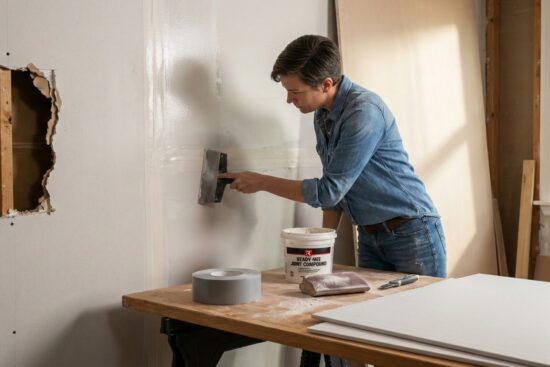
For ceiling gaps, apply joint compound in thin layers. Sand between coats for seamless blending. As one contractor advises: “Take time smoothing edges—it makes painting effortless later.” Finally, inspect both ends of the opening for alignment issues before celebrating your new open space!
Conclusion
Creating open, inviting spaces requires more than vision—it demands careful execution. Start by confirming structural roles: load-bearing elements like beams or joists need professional evaluation. Never skip utility checks—hidden plumbing or electrical lines can turn excitement into emergencies.
Equip yourself with the right tools. A reciprocating saw slices through studs efficiently, while a pry bar handles drywall cleanly. Always prioritize safety: seal work areas to contain dust and protect your home’s air quality.
Remember, permits aren’t red tape—they’re insurance against future headaches. Partner with licensed experts for complex tasks, especially when rerouting systems. This methodical approach preserves your home’s integrity while achieving modern design goals.
By balancing DIY enthusiasm with smart planning, you’ll unlock brighter, more functional living areas. Let natural light flood your refreshed space, knowing every step followed industry-tested practices. Ready to begin? Double-check your checklist, then transform your home with confidence!


