Thinking about new floors for your home? It’s a big decision. The right choice can completely transform your living space. It adds warmth, beauty, and significant value to your property.
Many homeowners dream of a classic wood look. This type of surface offers timeless appeal. According to the National Wood Flooring Association, a well-maintained wood surface can last for generations. This durability makes it an environmentally friendly choice, reducing landfill waste over time.
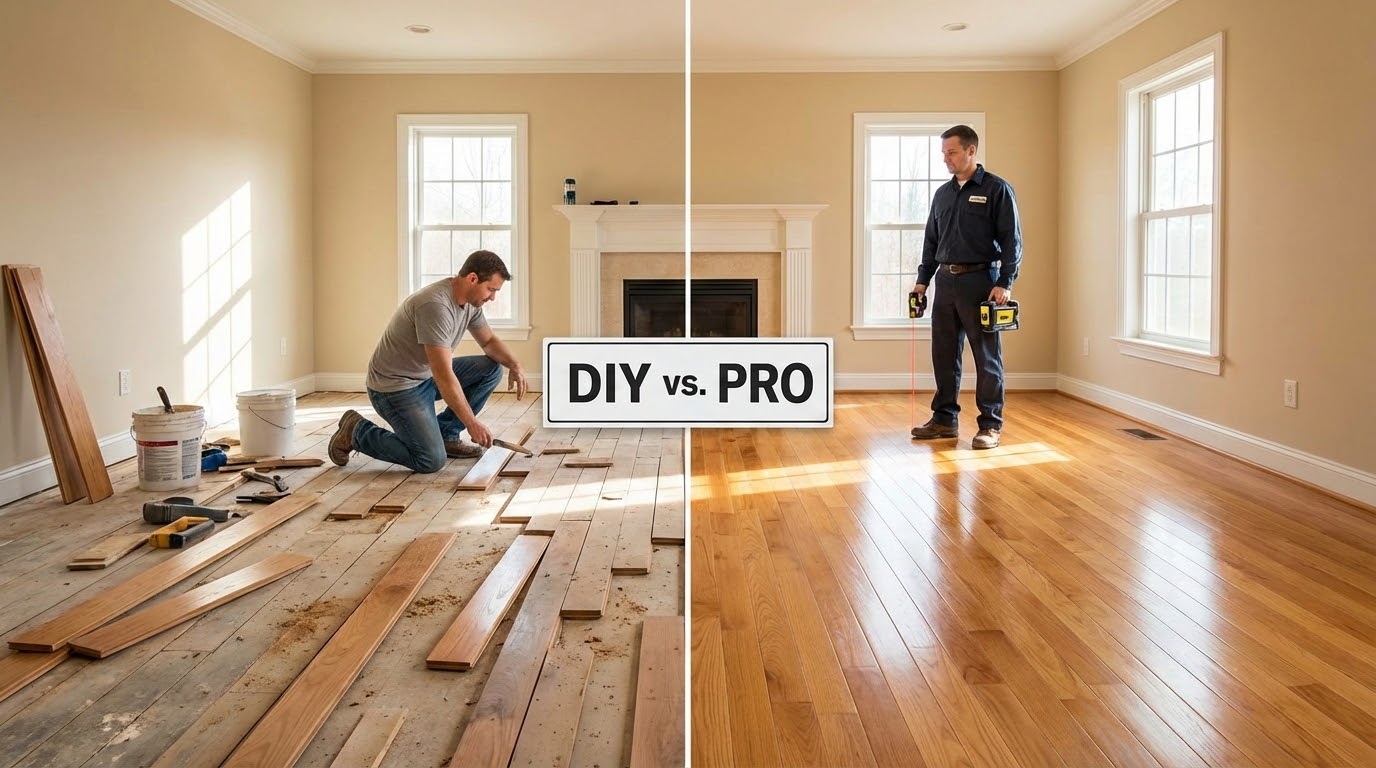
But how do you achieve this upgrade? The biggest question is often whether to tackle the project yourself or hire a pro. This guide will explore that very choice.
We will break down the true costs beyond just materials. You’ll learn about the time, skill, and tools needed for a successful DIY project. We’ll also examine what professional services offer. Our goal is to give you a clear picture to make the best decision for your home and budget.
Key Takeaways
- New wood floors can dramatically increase your home’s beauty and value.
- This type of surfacing is a durable and sustainable long-term investment.
- The decision between a DIY approach and hiring experts involves more than just cost.
- Understanding the required time and skill level is crucial for project success.
- This guide provides a detailed comparison to help you choose the right path.
Overview of Hardwood Flooring and Its Value
Natural wood surfaces bring a warmth and character to living spaces that synthetic materials simply cannot match. The choice between different types of hardwood flooring depends on your home’s specific needs and conditions.
Benefits and Aesthetic Appeal
This surfacing option offers unmatched beauty that grows more attractive over time. Each plank tells a unique story through its natural grain patterns. The rich textures create an inviting atmosphere that complements any decor style.
According to experts at This Old House, well-chosen wood surfaces can significantly increase property value. They provide lasting durability that stands up to daily life while maintaining their elegant appearance.
Solid vs. Engineered Hardwood Options
Understanding the two main types of flooring is crucial for making the right decision. Solid hardwood consists of a single piece of wood that can be refinished multiple times. This makes it ideal for areas with stable humidity levels.
Engineered options feature a real wood veneer bonded to stable core layers. This construction provides better moisture resistance for basements or concrete subfloors. Both choices offer the timeless appeal that makes wood surfaces so desirable.
Popular species like oak, walnut, and maple each bring distinct characteristics to your space. The thickness difference between traditional 3/4″ and engineered 5/8″ options affects installation planning.
Hardwood Floor Installation: DIY vs. Professional Approaches
The decision between tackling a home renovation yourself or hiring experts involves more than just financial calculations. Your choice will affect the timeline, quality, and overall experience of your home transformation.
Evaluating DIY Costs and Benefits
Taking on this project yourself can lead to significant savings. Labor costs often represent a substantial portion of the total expense for surfacing work.
The primary advantages include personal satisfaction and scheduling flexibility. You control the pace without coordinating with contractor availability.
However, DIY demands considerable time investment and physical effort. Proper technique learning and patience during the acclimation phase are essential for success.
When to Hire a Professional
Expert installers bring specialized tools and guaranteed efficiency to the table. They complete work faster with professional results.
Consider professional help for complex room layouts or expensive wood species. Large areas or lack of carpentry confidence also warrant expert assistance.
Many homeowners successfully handle their own projects with proper planning. The key lies in thorough preparation and knowing when to seek consultation.
Budgeting Your Hardwood Flooring Project
A well-structured budget ensures your renovation stays on track and avoids unexpected surprises. Proper financial planning transforms your vision into reality without breaking the bank.
Start by calculating your room’s square footage. Measure length and width, then multiply these dimensions. This gives you the total coverage needed for your project.
Material and Labor Costs
Material prices vary based on wood species and finish type. Exotic hardwoods command premium prices compared to domestic options.
Always purchase 10-15% extra material. This accounts for cutting waste and future repairs. Having matching material available saves headaches later.
| Cost Category | DIY Approach | Professional Service |
|---|---|---|
| Material Costs | $4-12 per sq ft | $4-12 per sq ft |
| Labor Expenses | $0 (your time) | $3-8 per sq ft |
| Tool Rental/Purchase | $200-500 | Included |
| Waste Factor | 10-15% extra | 10-15% extra |
Hidden Expenses and Contingency Planning
Unexpected costs often include subfloor repairs and transition pieces. Consider thickness differences between rooms to avoid height issues.
Set aside 10-20% of your total budget for contingencies. This covers unforeseen problems like subfloor damage or additional materials.
Factor in the cost difference between pre-finished and unfinished options. While unfinished wood costs less initially, professional finishing adds significant expense.
Tools, Preparation, and Subfloor Readiness
Before the first board is ever laid, the real work of a successful project begins with preparation. Getting this stage right prevents headaches and ensures a beautiful, durable result. Proper tool gathering and surface readiness are non-negotiable.
Essential Tools and Equipment
Having the right gear makes the entire process smoother. Start with basic hand tools like a tape measure, chalk line, and pry bar. A hammer and nail set are also essential for certain tasks.
Power tools will save you significant time and effort. A saw for cutting, a jigsaw for tricky spots, and a drill are fundamental. For fastening boards efficiently, a pneumatic flooring nailer with a compressor and mallet is highly recommended.
Don’t forget safety and comfort items like knee pads. For a detailed list, consult this comprehensive tools checklist.
Subfloor Preparation and Acclimation Tips
The subfloor must be clean, dry, and level. Remove all old materials and vacuum the area thoroughly. Inspect for damage or moisture and make repairs.
Next, install a vapor barrier. A classic product like Red Rosin paper works well. Lay it across the entire subfloor, overlapping rows by several inches.
Finally, let your wood planks acclimate. Unbox them and let them sit in the room for several days. This crucial time allows the material to adjust to your home’s humidity, preventing future problems.
Step-by-Step Guide to a Professional-Looking Floor
The moment of truth arrives when you’re ready to lay down your first plank. This phase transforms your preparation into visible progress. A careful, methodical approach here ensures a beautiful, long-lasting result.
Laying the First Row and Setting Expansion Gaps
Begin by snapping a chalk line parallel to your longest wall. Remember to account for a 3/4-inch expansion gap around the entire room’s perimeter. This space is crucial for natural wood movement.
Place your first board along this line with its groove facing the wall. Secure this initial row by face-nailing. Countersink the nails slightly below the surface for a clean look.
Staggering Board Joints for Structural Integrity
As you add subsequent rows, focus on staggering the end joints. Aim for at least a 6-inch separation between joints in adjacent rows. This technique prevents weak spots and creates a stronger surface.
Use a flooring nailer for most of the work. Drive fasteners every 6 to 8 inches along the board’s length. A small piece of your material makes an excellent tap block to seat pieces firmly before nailing.
| Installation Area | Fastener Spacing | Tool Recommended |
|---|---|---|
| Along Board Length | Every 6-8 inches | Flooring Nailer |
| Near Board Ends | Within 2-3 inches | Flooring Nailer |
| First & Last Rows | As needed for security | Face Nailing |
Finishing Touches: Trimming and Baseboards
For the final rows where your nailer won’t fit, switch back to face-nailing. A pull bar helps draw these last boards tightly into place.
Complete the project by filling any visible nail holes with matching wood putty. Install or replace baseboards to cover the expansion gap, nailing them to the wall, not the floor. This allows for movement and gives your project a polished, professional finish.
Troubleshooting and Maintaining Your Hardwood Floors
Maintaining the beauty of your investment requires regular care and knowing how to address common problems that may arise. Even with careful installation, wood surfaces can develop minor issues over time that have straightforward DIY solutions.
Addressing Gaps, Squeaks, and Nail Holes
Gaps between boards often result from humidity changes or improper acclimation. For minor spacing issues, try using a humidifier to increase moisture levels. This may cause the wood to expand slightly and close small gaps naturally.
Larger openings require wood filler or thin strips of matching material. Squeaky areas typically indicate movement between planks and the subfloor. Locate the exact source and drive thin finish nails at an angle through problem boards.
For persistent noise, you might need to access the area from below. Use wood blocks to stabilize troublesome spots. Surface damage like burn marks can be repaired by gentle sanding with fine-grit paper.
Long-Term Care and Maintenance Tips
Regular sweeping or vacuuming prevents dirt from scratching the surface. Use a slightly damp mop for occasional deep cleaning, but avoid excessive water that can cause damage.
Clean up spills immediately and place area rugs in high-traffic zones. Maintain consistent indoor humidity levels between 30-50% to minimize seasonal expansion and contraction.
Consider applying a new coat of finish every few years. This protects the material and refreshes its appearance. Proper care extends the life of your beautiful surface for generations.
Conclusion
As you reach the end of this comprehensive guide, you’re now equipped to make the best choice for your space. Whether you pursue a DIY approach or hire professionals, this home improvement project represents a significant investment in your property’s beauty and value.
The decision ultimately balances cost savings against time, skill requirements, and desired results. Personal satisfaction from doing it yourself can be incredibly rewarding. However, professional expertise ensures efficiency and often comes with valuable warranties.
Remember that proper preparation and attention to detail make all the difference. Accurate measurements, patient acclimation, and careful workmanship lead to stunning, long-lasting results.
Your transformed living area will provide enjoyment for years to come. Trust your assessment of skills, budget, and timeline to guide your final decision with confidence.
FAQ
Is it cheaper to install wood boards myself?
It can be, but only if you already own or can rent the right tools. You’ll save on labor, but you need to factor in the cost of equipment like a flooring nailer, a mallet, and a saw. Mistakes can be costly, so it’s often best for smaller rooms if you’re experienced.
What’s the difference between solid and engineered wood?
Solid planks are made from a single piece of timber and can be sanded and refinished many times. Engineered options have a top layer of real wood over a plywood base, making them more stable, especially in areas with moisture like basements.
How long does a typical project take?
For a professional crew, a standard room might take a day or two. A DIY enthusiast tackling the same area could spend a weekend or more, depending on subfloor preparation and their skill level. Don’t forget the crucial step of letting the wood acclimate to your home’s humidity for a few days first!
What is an expansion gap and why is it important?
This is a small space left around the room’s perimeter, usually hidden by baseboards or trim. Wood naturally expands and contracts with changes in humidity. The gap prevents the boards from buckling or warping when they expand, which is essential for a long-lasting result.
How do I prepare my subfloor?
Your subfloor must be clean, dry, and level. Any imperfections can telegraph through your new surface. You may need to lay down a vapor barrier, like rosin paper, to protect against moisture. A thorough prep job is the foundation for a beautiful, squeak-free finish.
How do I maintain my new floors?
Regular sweeping or dust-mopping is key. Use a cleaner specifically designed for wood surfaces. Avoid excessive water and clean up spills immediately. Place felt pads under furniture legs to prevent scratches, and use area rugs in high-traffic zones to protect the finish.


