Welcome to the world of outdoor improvement! Creating an inviting space in your backyard can transform how you enjoy your home. Many homeowners dream of having a perfect area for family gatherings and summer relaxation.
A common question arises: should you tackle this project yourself or hire professionals? This guide helps you make the right choice based on your skills, budget, and timeline. We’ll walk you through everything from planning to completion.
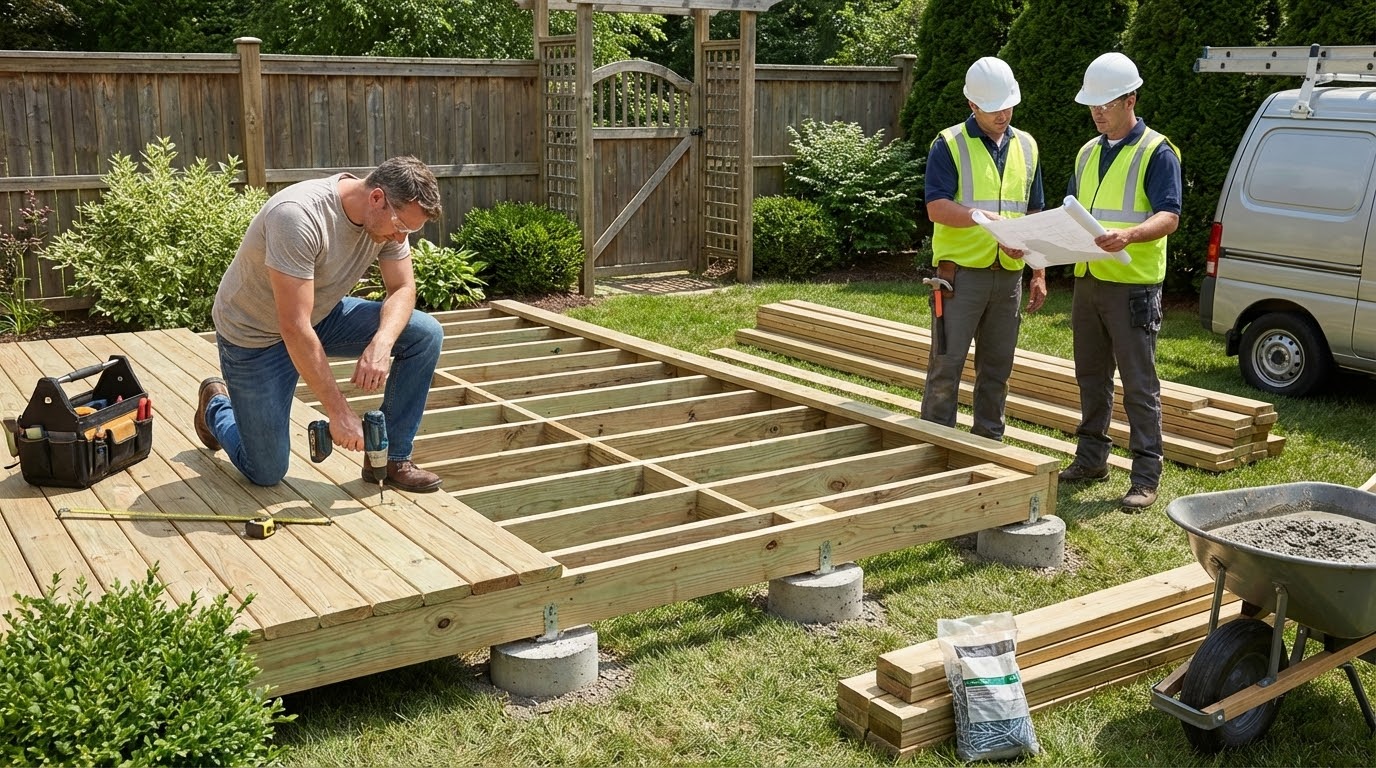
Constructing an outdoor platform is rated as relatively straightforward. While digging holes and pouring concrete requires effort, framing and laying boards is manageable for many DIY enthusiasts. Proper planning and safety make the process smoother.
A typical 10×16-foot pressure-treated structure costs $800 to $1,000 in materials. Construction takes 4 to 6 days, plus one week for concrete to cure. The satisfaction of creating your own space can be incredibly rewarding.
Key Takeaways
- Outdoor platform construction is rated as beginner-friendly for most homeowners
- Material costs for a standard size typically range from $800 to $1,000
- The project timeline includes 4-6 days of work plus concrete curing time
- Personal skills assessment is crucial for deciding between DIY and professional help
- Proper planning and safety measures ensure successful completion
- This enhancement can significantly increase your property’s value and enjoyment
Deck Building DIY: Essential Steps for Starting Your Project
Before swinging the first hammer, it’s crucial to map out the systematic approach to outdoor structure assembly. Breaking this ambitious endeavor into manageable phases makes the entire process less overwhelming. Each step builds upon the previous one, creating a logical flow.
The first phase involves detailed planning and layout. You’ll create comprehensive plans, determine the ideal size and location, and physically mark the footprint using stakes and string. This foundation work ensures everything starts on the right track.
Next comes the structural framework installation. This critical step involves setting posts and creating the framing system. Proper concrete footings and solid lumber create a stable base that will support your entire creation for years to come.
The third phase is where your vision truly takes shape. Installing the surface boards and safety railings transforms the framework into a functional outdoor living area. This exciting step makes the project feel real and tangible.
Access points come next with stair construction. Careful measurements ensure comfortable, code-compliant steps that provide safe entry and exit. The final phase allows for personalization through finishing touches and accessories.
Understanding what you need know before each phase prevents costly errors. Following this sequence helps you stay organized while you build deck structures efficiently. The methodical approach reduces the likelihood of redoing work later.
Assessing Your DIY Skills vs. Hiring a Professional
Before committing to either path, take time to realistically evaluate what you can handle versus what might require professional assistance. This honest self-assessment prevents costly mistakes and ensures your outdoor project succeeds.
Tackling the construction yourself offers significant advantages. You can save thousands of dollars on labor costs. The satisfaction of completing a major home improvement is incredibly rewarding.
Doing the work yourself makes perfect sense if you have basic carpentry experience. Simple, ground-level designs are ideal for beginners. Having friends or family to help makes the process smoother.
Hiring experts becomes advisable for complex multi-level designs or challenging terrain. Time constraints or unfamiliarity with power tools also suggest professional help. Local codes sometimes require licensed contractors for structural elements.
Consider a hybrid approach where you handle planning and finishing touches. Hire professionals for technical aspects like electrical or complex framing. These practical tips help you make the right choice for your situation.
Make sure you’re honest about your limitations to avoid safety hazards. The goal is creating a beautiful, functional outdoor space that lasts for years. There’s no shame in getting help to achieve this.
Detailed Deck Planning and Design
The blueprint for your perfect outdoor retreat begins with thoughtful planning and design. This phase determines how well your new space will function and complement your home. Careful consideration now prevents costly changes later.
Creative Layout and Design Considerations
Think beyond basic rectangular shapes when designing your outdoor area. Multi-level configurations create visual interest and separate functional zones. Wraparound designs maximize usable space while complementing your home’s architecture.
Consider how people will move through the area and where furniture will fit. Sun exposure throughout the day affects comfort levels. Plan views you want to highlight and how the space connects to gardens or pools.
Budget, Complexity, and Site Variables
Five key factors shape your project: budget, complexity, size, local codes, and materials. Create a realistic budget that includes all necessary items. Remember to account for permit fees and unexpected expenses.
Site complexity affects both cost and construction difficulty. Sloped yards require additional support structures. Height requirements may trigger railing and stair needs. Always check local building regulations before finalizing plans.
Measure your available area carefully to ensure proper proportions. Your design should enhance rather than overwhelm your yard. A detailed plan with accurate measurements provides a clear vision of the finished look.
Materials, Tools, and Safety Considerations
Your choice of materials directly impacts both the appearance and longevity of your finished outdoor space. Selecting the right components ensures your project will serve you well for years to come.
Essential Tools and Decking Materials
The right materials create a foundation for success. Pressure-treated lumber offers affordable durability for structural framing. For surface boards, you have several excellent options.
| Material Type | Cost (10×16 ft) | Maintenance | Best For |
|---|---|---|---|
| Pressure Treated Wood | $800-$1,000 | Regular sealing required | Budget-conscious projects |
| Cedar/Redwood | Higher cost | Natural resistance | Premium natural look |
| Composite Decking | Highest upfront | Minimal care needed | Low-maintenance solution |
Essential tools include a tape measure, circular saw, and drill. Specialized equipment like a post-hole digger ensures proper footing installation. Having the right tools makes work safer and more efficient.
Safety Gear and Best Practices
Always prioritize safety when working with materials and tools. Wear gloves to protect against splinters and safety goggles for eye protection. Ear protection is essential when operating loud power tools.
Keep your work area organized and read all tool manuals before use. Stay hydrated and take regular breaks during physical labor. These practices prevent accidents and ensure a smooth project experience.
Inspect all boards for straightness and quality before installation. Proper material calculations prevent shortages and reduce waste. Quality materials and careful planning lead to professional results.
Constructing the Deck Frame and Joists
Precision in the framing stage determines the longevity and safety of your project. This critical phase creates the structural skeleton that supports everything from surface boards to furniture. Attention to detail here prevents issues later.
Installing Ledger Board and Joist Hangers
Begin by attaching the ledger board to your home’s structure. Remove siding and apply waterproof membrane before securing with properly spaced lag screws. Spacer blocks create essential drainage space behind the ledger.
Complete the waterproofing with metal flashing over the membrane. Install joist hangers at both ends of the ledger. This careful approach protects your home from moisture damage.
Setting Footings, Piers, and Post Bases
Dig footing holes below your region’s frost line to prevent winter heaving. Use string lines to ensure level pier heights. Allow concrete to cure fully before proceeding.
Install post bases on cured piers using anchor bolts. Assemble doubled rim joists and beams with construction adhesive. The frame perimeter must be square and level before adding interior joists.
Space joists 16 inches on center using appropriate hangers. Check alignment frequently as you work. A properly constructed frame provides decades of reliable service.
Installing Decking, Railings, and Finishing Touches
The most rewarding phase begins as your project transforms from structural framework to finished outdoor living area. This is when all your planning pays off with visible progress.
Deck Board Installation and Adhesive Techniques
Start by attaching trim boards to the outside edge of your framing. Use finish nails spaced every 12 to 16 inches for secure attachment. This creates a clean finished look.
Measure carefully from the wall to the trim board’s outer edge. Add 1 inch for proper overhang before cutting your decking materials. Precision here ensures professional results.
Apply polyurethane marine sealant along the top edge of side rim joists. Lay your first straight board in the adhesive with a consistent 1-inch overhang. Secure each end with finish nails.
Use temporary spacer nails between boards to maintain even gaps. This allows for drainage and wood movement. Continue this pattern across the entire surface.
| Installation Method | Best For | Key Advantage |
|---|---|---|
| Adhesive + Nails | Wood decking | Prevents squeaking |
| Hidden Fasteners | Composite boards | Clean appearance |
| Screws Only | Budget projects | Easy adjustment |
Building Stairs and Railings for Safety
Any structure over 30 inches high requires stairs and railings. Calculate consistent step dimensions for safety. A 7-inch rise with 11-inch run works well.
Cut identical stringers to support your steps. Attach them securely to both the framing and landing area. Install treads and risers with strong connections.
For railings, place posts at corners and along the edge. Make sure they’re perfectly vertical. Connect top and bottom rails between these supports.
Install balusters with spacing less than 4 inches. This prevents children from slipping through. Follow local codes for all safety features.
Add finishing touches like post caps and lighting. These elements enhance both safety and appearance. Your beautiful new space is nearly complete.
Navigating Local Codes and Permits for Your Deck
Navigating regulations might seem tedious, but proper compliance ensures your outdoor addition stands the test of time. Local requirements protect your family’s safety and your property’s value.
Understanding Building Codes and Permit Requirements
Before any digging begins, call 811 to locate underground utilities. This free service prevents dangerous encounters with gas lines or electrical cables.
Common safety rules include specific measurements for door step-downs. The finished surface must sit 4 to 7¾ inches below door sills. Baluster spacing typically needs to be less than 4 inches.
Structures over 30 inches high require stairs and railings. Lower platforms might not need these features depending on your area’s rules.
The permit process involves submitting detailed plans to your local building department. Requirements vary significantly between different jurisdictions.
Skipping proper permits can lead to fines or forced removal. It may also create issues when selling your home. Building inspectors are valuable resources who ensure safety.
Schedule inspections after footings, framing, and final completion. Keep all documentation for future reference. Following the correct order protects your investment.
Tips for Maintaining the Aesthetic and Functionality of Your Deck
Proper maintenance transforms your investment from a temporary project into a lasting asset. Your outdoor living area requires different care approaches based on material choices. These practical tips help preserve both beauty and safety.
Routine Maintenance and Care
Material type determines your maintenance schedule. Pressure-treated lumber needs the most attention to prevent weathering. Cedar offers natural resistance but still benefits from protection.
Composite materials provide the easiest care solution. They resist moisture and require minimal upkeep. Regular sweeping prevents debris buildup.
| Material Type | Cleaning Frequency | Protective Treatment |
|---|---|---|
| Pressure-Treated Wood | Annual deep clean | Sealant every 2-3 years |
| Cedar/Redwood | Bi-annual cleaning | Optional protective stain |
| Composite | Seasonal light cleaning | No sealing required |
Choose finishes that match your desired look. Clear sealers show natural wood grain while providing protection. Semi-transparent stains add color without hiding texture.
“Regular maintenance isn’t just about appearance—it’s about preserving structural integrity and ensuring years of safe enjoyment.”
Seasonal care protects your outdoor space. Remove leaves promptly to prevent moisture traps. Inspect connections annually for safety.
Address issues quickly to maintain your deck‘s beauty. Tighten loose railings immediately. Replace damaged boards before problems spread.
Conclusion
With all the essential information now at your fingertips, you’re ready to transform your backyard into a beautiful outdoor living space. This comprehensive guide has shown that creating a functional area for your home is an achievable goal when approached with proper planning and attention to detail.
Remember that honest self-assessment of your skills and time availability leads to the best outcomes. Whether you choose to build deck structures yourself or partner with professionals, the key is making informed decisions based on your specific situation.
From initial planning through adding those final finishing touches, each step builds upon the last. Proper techniques like maintaining consistent measurements with your tape and ensuring components are level create lasting results. Your choice between pressure treated wood, natural species, or composite materials will shape both appearance and maintenance needs.
Take pride in your accomplishment as you create a space for countless memories. Your new outdoor area represents a tangible improvement to your property and quality of life for years to come.
FAQ
How do I know if I’m ready to tackle this project myself?
Honestly assessing your skills is key. If you’re comfortable with tools like a circular saw and level, and you understand framing basics, a simple ground-level structure might be a good fit. For multi-level projects, complex footings, or if you’re unsure about local codes, consulting a pro is a smart move.
What’s the most common mistake people make when installing the frame?
Not getting the ledger board perfectly secure and level is a big one. This board attaches your project to your home and sets the stage for everything else. Also, ensure your joists are properly spaced and that you use galvanized joist hangers for a strong, safe frame.
Is composite decking worth the extra cost compared to pressure-treated wood?
A> Composite materials often cost more upfront but require much less maintenance over time. You won’t need to sand, stain, or seal it annually. If you prefer spending your weekends relaxing rather than on upkeep, composite can be a fantastic long-term value.
Do I really need a permit for my backyard project?
A> In most areas, yes. Any structure attached to your house or over a certain height will likely require a permit. It’s crucial to check with your local building department. This ensures your work meets safety standards and avoids potential issues when you sell your home.
What are some essential safety tips for this kind of work?
A> Always wear safety glasses and hearing protection when cutting. Use a sturdy ladder and have a helper when handling long boards. Be extremely cautious with power tools, and never remove safety guards. Taking a few extra moments for safety makes the whole process smoother.
How can I keep my new space looking great for years?
A> Regular cleaning is the simplest way. For wood, a yearly inspection and sealant will protect it from the elements. For composite, a simple wash with soap and water usually does the trick. Keeping debris clear from between the boards also helps prevent moisture buildup.


