Welcome to your complete guide on making smart decisions about your home’s thermal protection. Many homeowners face the same question: should I tackle this project myself or call in the experts? We’re here to help you answer that with confidence.
Understanding when a do-it-yourself approach works can save you significant money while still achieving excellent energy savings. This guide gives you all the essential information to make an informed choice about your home improvement project.
We’ll explore the key factors that determine whether your specific situation is suitable for DIY work or requires professional expertise. By the end, you’ll have the knowledge to assess your own needs and move forward in the most cost-effective way possible.
Key Takeaways
- DIY insulation projects can save thousands of dollars when done correctly
- Proper thermal protection significantly improves your home’s energy efficiency
- Some projects require specialized equipment and professional expertise
- Understanding your home’s specific needs is crucial for success
- Safety considerations often determine whether DIY is appropriate
- Different areas of your home may require different approaches
- This guide provides comprehensive information for informed decision-making
Understanding Home Insulation Basics
Before diving into project decisions, it’s essential to grasp the core principles that make your living space energy-efficient. Thermal barriers work by slowing heat transfer between your conditioned indoor areas and the outside environment.
Key Benefits and Energy Savings
Proper thermal protection delivers significant financial advantages. The U.S. Environmental Protection Agency confirms substantial savings are possible with quality materials.
Proper wall insulation can help you save up to 15% on heating and cooling costs.
These energy savings typically allow homeowners to recoup their investment within a few years. The Department of Energy notes this improvement also boosts your property’s resale value.
Impact on Comfort and Soundproofing
Beyond financial benefits, thermal barriers create more consistent temperatures throughout your home. They eliminate frustrating hot and cold spots in different rooms.
The material also acts as an effective sound absorber. It reduces noise transmission between rooms and from external sources, creating a quieter living environment.
| Benefit Type | Primary Advantage | Secondary Impact |
|---|---|---|
| Energy Efficiency | Lower utility bills | Reduced environmental impact |
| Comfort Control | Consistent temperatures | Eliminated hot/cold spots |
| Sound Management | Noise reduction | Enhanced privacy |
| Moisture Control | Condensation prevention | Mold/mildew protection |
Understanding these fundamental advantages helps homeowners appreciate why investing in quality thermal protection is one of the smartest decisions for long-term comfort and savings.
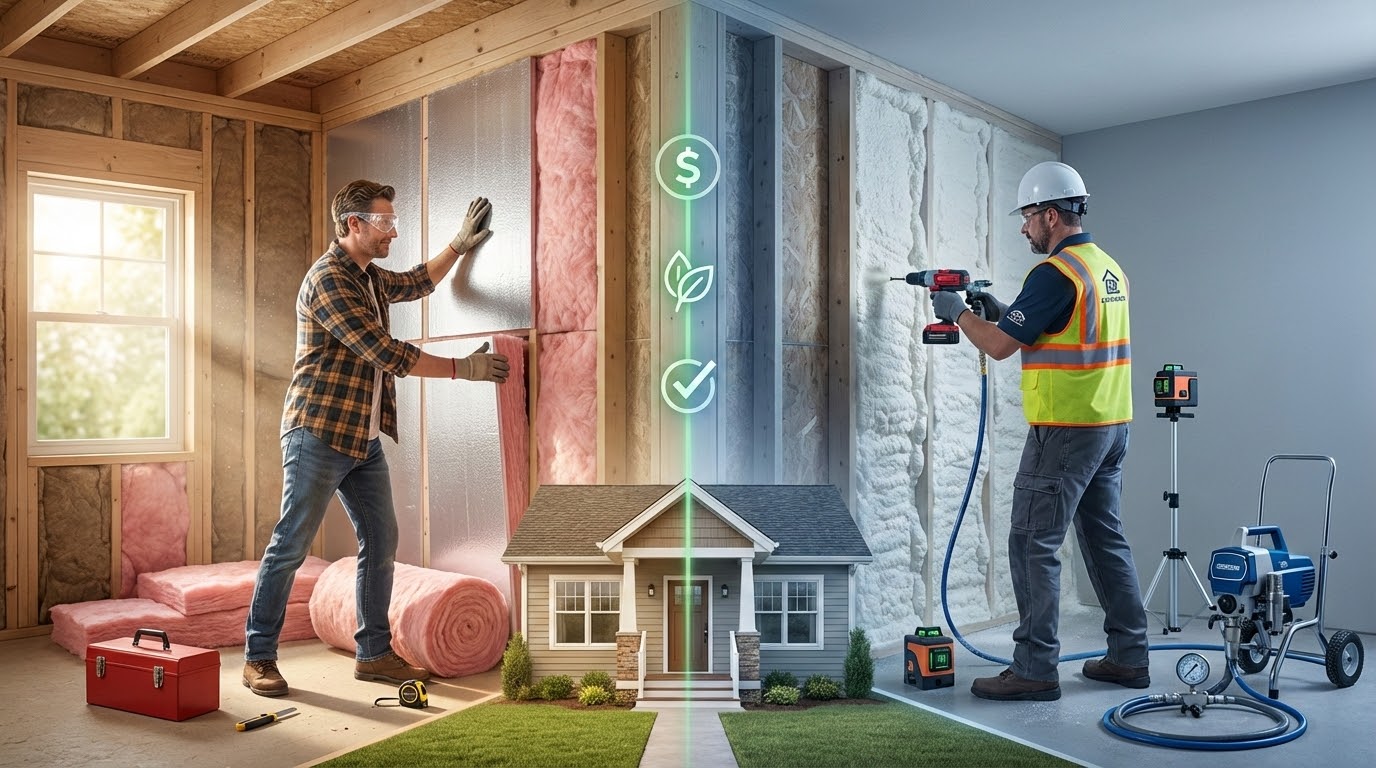
Assessing DIY Versus Professional Insulation Choices
Choosing between a do-it-yourself approach and professional assistance for your thermal protection needs depends largely on the specific circumstances of your situation. This decision requires honest evaluation of your skills, the project scope, and potential challenges.
Several key considerations will guide you toward the right choice for your home. Understanding these factors ensures you make a cost-effective decision that delivers optimal results.
When DIY Is a Viable Option
Many homeowners can successfully handle basic thermal barrier projects. Fiberglass batts in accessible areas like open attics represent an excellent DIY option.
This type of work typically rates as skill level 1 out of 5. The process involves simple cutting, placing, and stapling techniques.
A standard 12-by-20-foot room requires just 2-4 hours of your time. This makes it a manageable weekend project for most handy individuals.
Recognizing the Need for Professional Help
Certain situations absolutely demand professional insulation installation. Complex wall structures or large-scale projects covering multiple areas require specialized equipment and expertise.
Professionals become essential when dealing with hazardous materials like asbestos. They also navigate complicated building codes and concrete block wall projects safely.
Spray foam applications and moisture problems represent additional scenarios where expert help ensures proper results. Knowing when to call professionals protects your investment and safety.
Preparing for Your Insulation Installation Project
Getting your workspace ready with the right equipment is the first step toward a successful thermal barrier project. Proper preparation prevents frustrating delays and ensures your work goes smoothly from start to finish.
Gathering Essential Tools and Materials
Before beginning any thermal protection work, collect all necessary items. Your toolkit should include a tape measure, sharp utility knife, and straightedge for precise cuts. A staple gun helps secure materials in place.
Safety equipment is non-negotiable for this type of project. Always wear protective gloves, safety glasses, and a dust mask. Long-sleeve shirts and pants protect your skin from irritation.
Choose your thermal barrier materials based on your specific needs. Options include fiberglass batts, spray foam, or cellulose. Some climates may require an additional vapor barrier.
Measuring and Calculating Insulation Needs
Accurate measurements prevent wasted trips to the store. Measure your wall or ceiling areas carefully using your tape measure. Write down all dimensions before purchasing materials.
Add about 10% extra to your calculations for waste and cutting errors. This buffer ensures you won’t run short during your project. Proper planning saves both time and money.
Having everything organized before you start makes the process much smoother. Keep your tools within easy reach and materials neatly arranged. This organization helps maintain safety and efficiency throughout your work.
Choosing the Right Insulation Material
Selecting the appropriate thermal barrier materials requires careful consideration of your home’s specific needs and budget constraints. The right choice impacts energy efficiency, comfort levels, and long-term savings.
Comparing Fiberglass Batts, Spray Foam, and Cellulose
Fiberglass batts offer a cost-effective solution at $0.30-$1.50 per square foot. These pre-cut panels fit standard wall studs perfectly for straightforward projects.
Spray foam provides superior performance but costs $3-$4 per square foot. This material expands to fill gaps, creating excellent air seals in challenging areas.
Cellulose represents an eco-friendly option priced between $0.60-$2.30. Made from recycled paper, it delivers thorough coverage and soundproofing benefits.
Understanding R-Values and Material Specifications
R-value measures thermal resistance—higher numbers indicate better performance. Standard fiberglass batt insulation typically offers R-15 for 2×4 walls.
Always verify that cellulose material includes fire retardant treatment. For irregular stud spacing, purchase batts sized for the widest bays and trim as needed.
| Material Type | Cost per Sq Ft | R-Value Range | Best Applications | Key Features |
|---|---|---|---|---|
| Fiberglass Batts | $0.30-$1.50 | R-13 to R-15 | Standard wall cavities | Easy DIY installation |
| Spray Foam | $3.00-$4.00 | R-6 to R-7 per inch | Hard-to-reach areas | Superior air sealing |
| Cellulose | $0.60-$2.30 | R-3.2 to R-3.8 per inch | Existing wall retrofits | Eco-friendly material |
Insulation Installation Techniques for Home Improvement
Mastering the right techniques can transform your thermal barrier project from frustrating to fantastic. Proper handling ensures materials perform at their best while keeping your home safe.
Step-by-Step Guide to Installing Insulation
Begin by cutting batts to width using a straight 2-by-4 as your guide. Press down firmly and make shallow cuts with your utility knife.
When trimming to length, tuck material snug against the top of stud bays. Allow it to run long at the bottom before cutting against the plate for perfect fit.
Working around obstacles requires special care. Split batts in half for wires, placing one section behind and one in front. Cut notches for outlet boxes after installation.
Never force materials into place. Gentle handling maintains air pockets that provide thermal resistance.
Creating Effective Barriers and Safety Practices
Safety barriers are essential around light fixtures. Use sheet metal or wire mesh to maintain 3-inch clearance from non-IC-rated recessed lights.
Always check fixture labels before beginning your work. Lights marked IC or ICAT can have materials placed directly against them.
For comprehensive installation preparation guidelines, consult professional resources. Proper techniques ensure your walls receive complete coverage without compression.
Critical Details for Batt and Attic Insulation
Proper attic preparation ensures your batt insulation delivers maximum energy efficiency. These often-overlooked details separate adequate thermal protection from exceptional performance.
Attic Access, Ventilation, and Baffles
Start by sealing attic access points permanently. Attach batt or rigid materials to hatches, matching surrounding R-values. Weather-stripping creates essential air seals.
Ventilation baffles maintain crucial air space above your thermal barrier. Measure carefully to preserve at least 1 inch between the roof deck and material top.
Proper ventilation prevents moisture buildup and extends the life of your thermal materials.
Fasten baffle bottoms to allow complete top plate coverage. Cut carefully around framing obstructions to prevent air movement through the barrier.
Installation Considerations to Meet Code Requirements
Verify batt width and R-value match local building codes before beginning. Friction-fit materials snugly between framing members.
Extend batts to the exterior edge of top plates. Ensure they sit flush against ventilation dams for continuous coverage.
| Component | Critical Detail | Code Requirement |
|---|---|---|
| Attic Access | Permanent insulation attachment | R-value match surrounding area |
| Vapor Retarder | 2-inch seam overlap | Proper moisture control |
| Ventilation Baffles | 1-inch minimum air space | Adequate roof ventilation |
| Multiple Layers | Bottom layer parallel, top perpendicular | Complete joist coverage |
For kraft-faced batts, fasten paper tabs to framing undersides without overlapping. Unfaced materials require separate vapor retarder installation with 2-inch seam overlaps.
Install an information card indicating insulation levels. This simple step meets code requirements and helps future homeowners understand your building’s thermal performance.
Troubleshooting Common Insulation Issues
Even with careful planning, homeowners often encounter unexpected challenges during thermal barrier projects. Identifying and solving these problems early ensures your energy-saving efforts deliver maximum results.
Addressing Air Leaks and Moisture Problems
Air infiltration represents one of the most common issues affecting thermal performance. These leaks allow conditioned air to escape, undermining your energy savings.
Seal all gaps around windows, doors, and electrical outlets before adding any materials. Use caulk for small cracks and expanding foam for larger openings.
Moisture control requires equal attention. Trapped dampness can lead to mold growth and reduce material effectiveness. Proper vapor barriers prevent condensation in cold climates.
Addressing moisture problems before installation prevents long-term damage to your home’s structure.
Managing Irregular Stud Spacing and Gaps
Older homes frequently present width variations between wall studs. These irregularities create gaps that compromise thermal protection.
Purchase batts sized for your widest spaces, then trim carefully to fit narrower areas. Avoid compressing materials, as this reduces their effectiveness.
For significant width differences, consider blown-in materials that adapt to unusual spaces. This approach ensures complete coverage without air pockets.
| Common Problem | Immediate Solution | Long-Term Prevention |
|---|---|---|
| Air leaks around openings | Caulk and foam sealing | Regular weather-stripping checks |
| Moisture accumulation | Vapor barrier installation | Proper ventilation maintenance |
| Irregular stud spacing | Custom-cut batt trimming | Professional assessment for major issues |
When you discover serious moisture problems or structural concerns, consult a professional. These red flags indicate needs beyond typical DIY solutions.
Energy Efficiency and Cost Savings with Proper Insulation
Investing in quality home insulation creates immediate and lasting rewards that extend far beyond simple temperature control. The financial, environmental, and comfort benefits make this one of the smartest home improvements available today.
Long-Term Financial Benefits
Your initial investment pays dividends quickly through reduced energy bills. According to the U.S. Environmental Protection Agency, proper wall insulation can help you save up to 15% on heating and cooling costs.
The U.S. Department of Energy confirms homeowners typically recoup their investment through energy savings within just a few years. Premium materials like spray foam cost more upfront but deliver superior performance over time.
This improvement also significantly boosts your property’s resale value. It’s an investment that pays you back both monthly and when you sell.
Environmental and Comfort Advantages
Beyond financial gains, energy-efficient living creates important environmental benefits. Reduced energy consumption lowers your home’s carbon footprint throughout the year.
Comfort improvements are immediately noticeable with consistent temperatures in every room. Drafts disappear while noise transmission decreases for a more pleasant living environment.
For detailed guidance on maximizing these advantages, consult the official energy department resource. The relatively short payback period makes this improvement exceptionally cost-effective.
Expert Tips and Considerations for Insulation Projects
Expert knowledge can elevate your thermal protection project from good to outstanding. Professional installers follow specific strategies that maximize energy efficiency throughout your home.
These advanced techniques ensure your investment delivers optimal comfort and savings. Understanding these professional approaches helps DIY homeowners achieve better results.
Combining Insulation with Air Sealing Strategies
Effective thermal barriers work best when paired with comprehensive air sealing. Seal all gaps around windows, doors, and wall penetrations before adding materials.
This dual approach prevents conditioned air from escaping through cracks. It creates a complete system that controls both heat transfer and air movement.
Pay special attention to corners and edges where different building materials meet. These transition areas are common weak points for energy loss.
Ensuring Continuous Coverage and Proper Fit
Complete coverage without gaps or compression is essential for maximum performance. Thermal bridges occur when thin spots or voids compromise your barrier’s effectiveness.
When adding layers in attic areas, work from the perimeter toward the opening. This prevents compressing existing material and maintains proper thickness.
You can mix material types—like adding loose fill over fiberglass batts. Just ensure layered materials are unfaced to prevent moisture issues.
| Technique Type | Critical Action | Common Mistake | Expected Result |
|---|---|---|---|
| Air Sealing | Seal all penetrations before insulating | Ignoring gaps around electrical boxes | 15-20% additional energy savings |
| Layering Materials | Use unfaced batts over existing insulation | Using vapor barriers between layers | Enhanced thermal performance |
| Edge Coverage | Fill cavities completely without compression | Leaving gaps at corners | Eliminated thermal bridges |
| Ductwork Protection | Insulate ducts in unconditioned spaces | Overlooking attic duct systems | Reduced energy loss from HVAC |
Never place materials over recessed light fixtures or soffit vents. Proper fit throughout the installation area ensures your thermal barrier performs as intended for years.
Conclusion
Your home deserves the best thermal protection, whether you choose DIY or professional help. This insulation installation represents a smart investment in comfort and energy savings.
By now, you understand when to tackle this project yourself and when to call experts. The key is matching your approach to your skills and the job’s complexity.
Remember that careful planning and proper techniques lead to success. Whether using fiberglass batts or spray foam, focus on complete coverage and safety.
Your efforts today mean decades of improved comfort and lower bills. This home improvement delivers lasting value for you and your family.
FAQ
Can I really save money by installing fiberglass batts myself?
For simple projects like an unfinished attic with easy access, a DIY approach can be a great way to cut costs. However, for complex areas like walls or around tricky obstacles, hiring a pro ensures proper coverage and avoids problems, which can save you money in the long run.
What safety gear do I need when working with this material?
A> Safety is key! Always wear a long-sleeved shirt, long pants, gloves, and safety glasses. A dust mask is also essential to avoid breathing in tiny particles. This gear protects your skin, eyes, and lungs from irritation.
What’s the difference between the paper facing and a separate vapor retarder?
The paper on some batts acts as a vapor retarder to control moisture. If your batts don’t have a facing, you may need to install a separate polyethylene sheet. It’s important to check your local building codes for the right placement, as getting this wrong can lead to moisture issues.
How do I handle awkward spaces around wires or pipes?
The best method is to split the batt. Use a sharp utility knife to cut the material lengthwise. Then, you can fit one piece behind the obstruction and the other in front of it. This technique helps maintain continuous coverage without leaving energy-wasting gaps.
Why is air sealing mentioned along with adding more material?
Sealing air leaks is a crucial first step! Even the best insulation won’t work well if air is moving through cracks and gaps. Combining air sealing with your project stops drafts and prevents moisture from getting into your walls, making the entire system much more effective.


