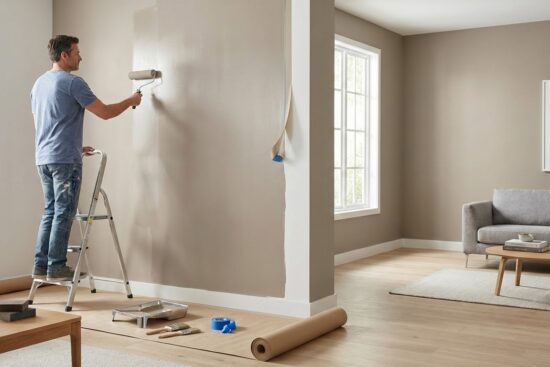
Have you ever glanced up at your home’s empty upper level and wondered what it could become? Transforming underused areas into functional living spaces is a growing trend, especially as families seek creative ways to expand without moving. A well-planned renovation can breathe new life into forgotten square footage, offering both practicality and long-term value.

Imagine adding a cozy guest suite, a home office, or even a playroom—all within your existing footprint. Projects like these typically take 3-4 months to complete, with costs varying based on design choices and structural needs. For example, one homeowner turned their dusty storage zone into a bright yoga studio, while another created a teen hangout spot with built-in shelving.
The benefits go beyond extra room. Upgrading this area can boost your property’s market appeal by up to 12%, according to recent data. Partnering with skilled contractors ensures safety and maximizes every inch, from insulation to lighting. Plus, you’ll avoid the hassle (and expense) of relocating.
Key Takeaways
- Maximize existing square footage by reimagining overlooked areas of your house.
- Adding functional rooms like guest suites or offices can increase property value.
- Most projects take 3-4 months, depending on complexity and design goals.
- Costs vary but often provide a higher return than moving or expanding outward.
- Professional guidance ensures compliance with building codes and efficient space use.
Introduction to Attic Conversion Projects
That dusty area above your head could be your home’s next big upgrade. Repurposing unused upper-level space offers endless possibilities for modern living. Whether you need extra square footage or want to boost your property’s appeal, this project blends creativity with practicality.
What Is an Attic Conversion?
An attic conversion transforms neglected areas into functional rooms. Homeowners often turn this zone into a guest room, home office with natural light, or smart storage solutions. Unlike traditional renovations, it focuses on utilizing existing square footage without expanding your building’s footprint.
Benefits of Converting Your Attic
Adding flexible space can solve common household challenges. A young family in Ohio created an additional bedroom for their twins, while a freelancer in Texas designed a soundproof workspace. These upgrades often increase property value by 10-15%, according to regional real estate trends.
Before starting, review local building codes for ceiling height and insulation standards. Proper planning ensures your new room meets safety guidelines while fitting your lifestyle. With thoughtful design, that overlooked area becomes a cherished part of your home.
Planning Your Attic Conversion Project
Your home’s hidden potential might be just a few steps above. Before swinging a hammer, smart preparation ensures your vision aligns with practical requirements. Let’s break down how to navigate measurements, regulations, and creative solutions.

Assessing Space and Building Codes
Start by measuring your ceiling height. Most areas require at least 7.5 feet for livable spaces. Check local codes—some cities demand specific floor joist spacing or insulation grades. For example, the International Residential Code states floor joists must support 30 pounds per square foot.
Don’t guess about structural needs. A contractor can verify if your floor can handle furniture or additional walls. One homeowner discovered their joists needed reinforcement before adding a reading nook. Always prioritize safety over speed.
Design Ideas and Permit Essentials
Low ceilings? Try built-in storage under sloped rooflines. Skylights add natural light without compromising headroom. Remember: any electrical work or window additions usually require permits.
Permit timelines vary. A Chicago family waited six weeks for approval, while a Portland project cleared in ten days. Pro tip: Submit detailed plans to avoid delays. “Securing permits might feel tedious, but they’re your safety net,” says a licensed contractor in Texas.
Attic Conversion Best Practices for Home Transformation
Unlocking the potential of your home’s highest floor starts with smart design choices. Focus on balancing aesthetics with structural integrity to create a space that feels both inviting and secure. Let’s explore how to achieve this harmony.
Maximizing Natural Light and Space
Skylights and dormer windows are game-changers for brightening tight areas. Position them along the roof’s slope to flood the room with sunlight. For example, a New York family used three staggered skylights to eliminate dark corners in their reading lounge.
Consider these window placement strategies:
| Window Type | Best For | Benefits |
|---|---|---|
| Skylights | Low-ceiling zones | Direct sunlight, privacy |
| Dormers | Expanding headroom | Added floor space, ventilation |
| Clerestory | Modern aesthetics | Even light distribution |
Ensuring Proper Insulation & Structural Safety
Spray foam insulation works well for irregular rafters, while rigid boards suit flat surfaces. Always reinforce load-bearing walls before adding heavy furniture. A Seattle homeowner avoided costly repairs by upgrading their staircase to meet local code requirements during their renovation.
Choosing the Right Contractor
Look for pros with 5+ years of experience in upper-level projects. Ask for before-and-after photos of similar jobs. “Verify their license and insurance first,” advises a Colorado-based project manager. “It’s your best defense against unexpected issues.”
Check online reviews and request itemized bids to compare pricing. A clear contract outlining timelines and material specs keeps everyone aligned.
Step-by-Step Guide to Finishing Your Attic
Transforming your home’s upper level into a functional area requires careful execution. Follow these practical steps to create a comfortable and code-compliant living space while avoiding common pitfalls.

Clearing and Preparing Your Attic
Start by removing all stored items and debris. Wear protective gear like gloves and masks—dust and insulation particles can irritate skin and lungs. Check for signs of pests or moisture damage. These issues must be resolved before proceeding.
Electrical, Plumbing, and Subflooring Essentials
Hire licensed professionals for wiring and plumbing work. Review local building codes for requirements on outlet spacing and pipe materials. Install subflooring panels perpendicular to joists for stability. This creates a sturdy base for your new living space.
Installing Insulation and Finishing Touches
Choose fiberglass batts or spray foam based on your climate zone. Make sure insulation fits snugly between rafters to prevent heat loss. Seal gaps with caulk before drywalling. A smooth paint job in light colors maximizes the sense of space.
Optimal Lighting and Flooring Solutions
Recessed lights work well in low-ceiling areas. Pair them with dimmers for adjustable ambiance. For flooring, consider engineered wood—it handles temperature changes better than solid planks. Add area rugs for warmth and noise reduction.
Budget-Friendly Ideas and Project Management
Smart budgeting transforms renovation dreams into reality. Let’s explore how to balance quality with affordability while navigating common financial hurdles.
Cost Breakdown and Budget Considerations
Typical projects range from $15,000 to $50,000 depending on your goals. Structural changes like raising ceiling height above 7 feet often account for 25% of costs. Roof modifications or dormer installations add $5,000-$12,000 but improve natural light and usable area.
| Expense Category | Average Cost | Key Factors |
|---|---|---|
| Materials | $8,000-$20,000 | Flooring type, insulation quality |
| Labor | $6,000-$25,000 | Roof complexity, local rates |
| Permits | $400-$1,500 | City requirements, project scope |
| Design Fees | $1,200-$4,000 | Architect involvement, 3D modeling |
DIY Options vs. Professional Assistance
Painting or installing shelving? Perfect DIY starter projects. Electrical work or load-bearing wall changes? Leave these to licensed pros. “A structural mistake could cost triple to fix later,” warns a Massachusetts contractor.
Consider hybrid approaches. Handle demolition yourself but hire experts for heating system upgrades. For cost-effective renovation strategies, prioritize insulation improvements and energy-efficient windows. These choices slash long-term bills while meeting modern building codes.
Always set aside 10-15% of your budget for surprises like hidden water damage or wiring updates. Weekly check-ins with your team keep timelines on track without breaking the bank.
Conclusion
Your home holds untapped possibilities right under its roof. Transforming unused upper spaces into a functional addition—like a sunlit office or extra bathroom—can redefine how you live. These projects not only create room to grow but often boost property value through smart upgrades.
Successful renovations start with planning. Always verify local building codes and partner with a trusted contractor to navigate structural needs. Strategic choices like energy-efficient window placements or upgraded insulation pay off in comfort and lower utility bills.
Remember: your vision should guide the process. Whether crafting play spaces or cozy reading nooks, prioritize features that match your lifestyle. With careful budgeting and professional help, that empty area becomes a cherished addition to your home.
Ready to explore your options? Take the first step today—your dream window-filled retreat or organized storage haven awaits just one floor up.


