Does your home have a neglected lower level gathering dust? Imagine transforming that chilly, underutilized area into a vibrant extension of your living space. With smart planning and creative design, you can unlock hidden potential right beneath your feet.

Converting unused square footage into functional rooms isn’t just about aesthetics – it’s a strategic move to boost your property’s value. Proper insulation, moisture control, and lighting upgrades turn dreary concrete boxes into cozy family rooms, home offices, or guest suites.
Before swinging the first hammer, make sure to assess structural elements like walls and flooring. Industry experts recommend sealing foundation cracks and installing vapor barriers to prevent future issues. These steps ensure your project stands the test of time while protecting your investment.
Thoughtful preparation also helps align your vision with practical needs. Will the space host movie nights or double as a workout zone? Early decisions about layout and electrical needs streamline the renovation process. With careful execution, your revamped lower level becomes a natural extension of your home’s personality.
Key Takeaways
- Maximize home value by converting unused areas into functional living spaces
- Address moisture and insulation issues early for long-lasting results
- Tailor designs to match your household’s specific needs and lifestyle
- Consult professionals for structural assessments before starting work
- Prioritize proper sealing of foundation walls to prevent future damage
Planning Your Basement Finishing Project
Transforming your lower level starts with smart preparation. Begin by evaluating the area’s current condition and local regulations. This ensures your vision meets both practical needs and legal requirements.
Assessing Your Space and Building Codes
Measure ceiling heights first—most areas require at least 7 feet for habitable rooms. Check walls for cracks or moisture using a simple plastic sheet test. “Always verify local codes before finalizing layouts,” advises a certified home inspector. This step prevents costly revisions later.
| Task | Average Cost | Time Required |
|---|---|---|
| Framing | $1,500-$3,000 | 3-5 days |
| Electrical Work | $800-$2,500 | 2-4 days |
| Plumbing | $1,200-$5,000 | 1-3 days |
Setting a Realistic Budget and Timeline
Allocate 15% extra for unexpected tasks like pipe repairs. For example, electrical updates often cost $1.50-$3.50 per square foot. Use a phased approach to manage work efficiently:
- Week 1-2: Demolition and inspections
- Week 3-4: Framing and utility installations
Explore cost-effective strategies to stretch your budget further. Prioritize living zones over storage areas to maximize daily use.
Designing a Functional Basement Living Area
Smart design transforms forgotten square footage into your home’s most versatile zone. Start by mapping activity areas that match your family’s habits – movie marathons need different setups than yoga sessions or craft stations.
Zoning for Multiple Activities
Divide your floor plan using these space-saving strategies:
- Use bookshelves as room dividers between office and lounge areas
- Install fold-down desks for compact workstations
- Mark play zones with colorful area rugs

Brightening Underground Rooms
Sunlight-starved areas gain cheer through clever techniques. “Window wells with prismatic glass can boost natural light by 300%,” notes lighting designer Mara Chen. Other bright ideas:
- Position mirrors opposite existing light sources
- Install LED panels resembling skylights
- Use light-colored finishes on walls and ceilings
Proper insulation keeps energy bills low while reducing noise transfer between floors. Spray foam between joists creates effective thermal barriers. Always check local codes before upgrading electrical systems – safety trumps convenience.
Layer lighting types for mood flexibility. Combine recessed fixtures with dimmable sconces and under-cabinet strips. This approach lets you shift from focused task lighting to relaxed ambiance with a few switch flips.
basement finishing: Essential Steps and Materials
Ever wonder how to turn that chilly under-home space into a cozy retreat? The secret lies in tackling three critical elements first. Proper preparation here makes all the difference between a temporary fix and a lasting upgrade.
Moisture Control, Insulation & Structural Integrity
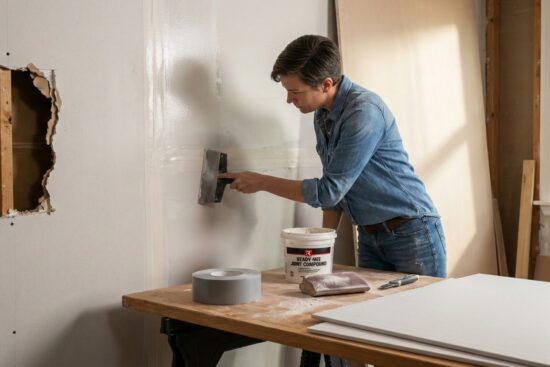
Start with a plastic sheet test: tape a 2×2 ft square to the floor and walls for 48 hours. Condensation under the sheet signals humidity issues. Fix leaks using hydraulic cement before applying waterproof block sealer to foundation surfaces. Menards’ mold-resistant drywall outperforms standard sheets in damp conditions, with fiberglass facing that resists warping.
Insulation comes next. Closed-cell spray foam creates air barriers while adding structural support between joists. “Horizontal drywall installation reduces visible seams by 40%,” notes contractor Luis Rivera. This method also strengthens walls against accidental impacts.
Selecting Durable Flooring, Walls, and Ceilings
Choose materials that laugh at spills and foot traffic. Luxury vinyl plank handles moisture better than hardwood, while ceramic tile works great near utility areas. For ceilings, consider lightweight PVC panels that snap together over support grids.
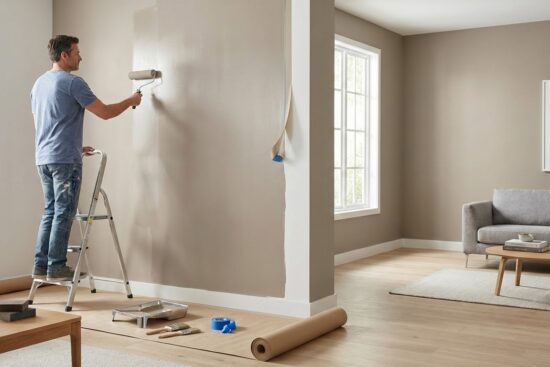
Finish with semi-gloss paint on walls for easy cleaning. These smart choices boost your home’s resale appeal while creating spaces that age gracefully. Remember – quality materials today mean fewer headaches tomorrow.
DIY Tips and Expert Advice for Homeowners
Balancing DIY enthusiasm with professional know-how makes home upgrades safer and more rewarding. Start by matching projects to your skills – simple cosmetic updates often work for beginners, while complex systems demand certified expertise.

Smart Project Selection Saves Thousands
Paint jobs and vinyl plank flooring installations offer great DIY opportunities. One homeowner saved $1,200 installing waterproof laminate themselves using online tutorials. But when Mark Thompson attempted rewiring without certification, it led to $3,400 in code violation fixes.
| Task | DIY Cost | Pro Cost | Skill Level |
|---|---|---|---|
| Drywall Installation | $0.50/sq ft | $2.00/sq ft | Intermediate |
| Faucet Replacement | $75 | $225 | Beginner |
| Circuit Wiring | Not Recommended | $1,800 | Expert |
Navigating Critical Systems Safely
Always hire licensed professionals for plumbing and electrical work. Improper return air vent installation can disrupt HVAC efficiency, while faulty wiring creates fire risks. “Homeowners often underestimate gas line complexities,” warns master plumber Elena Rodriguez.
For door replacements or flooring options, quality materials matter. Fiberglass entry doors provide better insulation than steel, while luxury vinyl withstands moisture better than hardwood. Use professional services for any structural changes affecting load-bearing walls.
Local building codes dictate requirements for basement egress windows and GFCI outlets near water sources. File permits early – inspections ensure each part of your project meets safety standards. With proper planning, you’ll create functional spaces that add value without compromising safety.
Conclusion
Unlocking your home’s full potential starts with reimagining overlooked spaces. Thoughtful upgrades transform underused areas into dynamic living zones that serve multiple purposes. Homeowners who invest in these projects often see increased property value while gaining functional rooms tailored to their lifestyle needs.
Quality materials like moisture-resistant lumber and durable flooring ensure lasting results. Real-life examples show how strategic planning creates inviting interiors – whether crafting play areas for kids or quiet workspaces. These improvements adapt effortlessly as household needs evolve over time.
Every successful renovation balances smart design with practical execution. Proper insulation, efficient layouts, and professional guidance turn ambitious ideas into reality. For those exploring transformative home projects, remember: even small changes significantly enhance daily living experiences.
Keep refining your plans as trends and technologies advance. With attention to detail and trusted resources, you’ll create spaces that delight your family while boosting your home’s market appeal. Ready to start your next improvement journey?


